Peanut Ladoo Recipe with step by step photos.

Peanut Ladoo Recipe is a super duper healthy recipe. Peanut ladoo has three ingredients. Peanuts, jaggery and cardamom. Peanut and jaggery both are superfoods, especially during winters. Peanuts are loaded with good fats so it makes your tummy feel full very quickly. Jaggery acts as a detox and aids in digestion. You will get approximately 70 calories by consuming one ladoo! So yes these Ladoos will help you in maintaining weight as well! Peanuts also contain monounsaturated fatty acids. They help in maintaining the glowing skin and create a balance between good and bad cholesterol in the body.


Peanut Ladoo Recipe is the simplest ladoo recipe. The reason I am calling it simplest is that it requires minimal cooking and minimal work for hands as well. Roasted Peanuts are blended with powdered jaggery and cardamon. This mixture is used for shaping ladoos. Yup, it is that easy! The mixture will start combining in the blender only. So, of course, its very very easy to shape peanut ladoos.

Easy quick recipe + so many health benefits! Its definitely a must have during this winter. Do try this recipe at home and don't forget to share it with your loved ones.

If you are looking for more ladoo recipes then check out Coconut Ladoo Recipe, Besan Ladoo Recipe and Boondi Ladoo Recipe.

मूंगफली के लड्डू रेसिपी हिंदी में पढ़ें

Here goes step by step Peanut Ladoo Recipe..

Peanut-Ladoo-Recipe-Served

Servings: 7 Bite-size peanut ladoos

Ingredients:

Peanuts(Moongphali) - 1/2 Cup
Jaggery(Gud) - 1/4 Cup (Grated)
Cardamom(Elaichi) - 3-4

Peanut Ladoo Recipe:

  1. Dry Roast peanuts on low flame.
  2. Let it cool down. Deskin it when it is warm and not so hot.
  3. Put it in a blender with jaggery and cardamom seeds.
  4. Blend it for about 8-10 seconds. Stop for a while. Repeat it until the mixture starts combining.
  5. Take some mixture in your hands and start shaping them into round bite-size balls.


Peanut Ladoo Recipe with step by step photos:

1. Take 1/2 cup Peanuts.

Peanut-Ladoo-Recipe-Step-1
Peanuts
 2. Dry roast them on low flame.

Peanut-Ladoo-Recipe-Step-1
Roasting Peanuts
 3. Deskin peanuts.

Peanut-Ladoo-Recipe-Step-3
Roasted de-skinned peanuts


4.  Put Peanuts in a blender.

Peanut-Ladoo-Recipe-Step-4
Roasted peanuts in blender
5. Add grated jaggery.

Peanut-Ladoo-Recipe-Step-5
Added grated jaggery
 6. Add cardamon seeds.

Peanut-Ladoo-Recipe-Step-6
Added cardamom seeds


 7. Blend for 8-10 secs. Stop for a while.

Peanut-Ladoo-Recipe-Step-7
Mixture after blending for the first time
 8. Blend it again. The mixture will start combining.

Peanut-Ladoo-Recipe-Step-8
Mixture after blending the second time
 9. Transfer it to a plate.

Peanut-Ladoo-Recipe-Step-9
Mixture is ready
 10. Start shaping ladoos.

Peanut-Ladoo-Recipe-Step-10
Shaping Ladoos 

Peanut-Ladoo-Recipe-Step-11
Shaping Ladoos
 11. Ladoo is ready!

Peanut-Ladoo-Recipe-Step-12
Ladoo is ready!
12. Similarly, shape all the ladoos. 

Peanut-Ladoo-Recipe-Served
Peanut Ladoos


Store it in an airtight container. The shelf life of this Peanut Ladoo is really good you can easily keep it for 2-3 months.
Don't forget to share your experience with me in the comment section below. 


Coconut Laddu Recipe with step by step photos.

Coconut is a very versatile ingredient. It can be used in several ways for both savoury and sweets. Coconut laddu recipe is one of the simplest and delicious coconut recipes that I can think of. It is prepared with just three core ingredients i.e., coconut, sugar and milk. In this coconut laddu recipe, I have added cardamom and cashews apart from the three core ingredients. You can experiment with the dry fruits. Melon seeds also taste good with coconut laddus.  You can also give it a twist by adding rose or pista or any other flavour of your choice!

Here goes the detailed step by step coconut laddu recipe...

Coconut-Laddu-Recipe-Served
Coconut Laddu Recipe


Servings: 30 Laddus(Medium size)

Ingredients:

Coconut - 4
Milk - 500ml
Sugar/jaggery - 3/4 cup or to taste
Dry fruits(Any) - Handful
Cardamom (Elaichi) Powder - 1/2 Tsp

Coconut Laddu Recipe:

  1. Blend roughly chopped coconut. Don't add water. You can also use desiccated coconut or grate fresh coconut.
  2. Put it in a kadhai. Add milk.
  3. Cook it on medium flame. Stir occasionally. This will take more than 30 minutes. 
  4. Stir often when the milk thickens.
  5. Add dry fruits and Cardamom(elaichi) powder. In this recipe, I have added cashews only. However, you can add any dry fruit of your choice. Melon seeds also taste very good with these laddus.
  6. Press this mixture with the back of the spatula. Check if milk is coming out. If no then good to go otherwise keep on stirring it until mixture is really dry. Make sure that you don't hurry for this step. If mixture will not become dry then it will become impossible to shape laddus.
  7. Once the mixture is dry, transfer it to a plate. Spread it. Let it cool down a bit.
  8. Once your mixture is slightly cool and you are comfortable working with it, then start shaping laddus.
  9. For this, you need to take some mixture. Press it really tight first then start giving it round shape.
  10. Laddus are ready! Don't forget to share it with your loved ones :)


Coconut Laddu Recipe with step by step photos:

  1. Blend roughly chopped coconut. Don't add water. You can also use desiccated coconut or grate fresh coconut.


    Coconut-Laddu-Recipe-Step-1
    Roughly chopped coconut

  2. Put it in a kadhai. 

    Coconut-Laddu-Recipe-Step-2
    Grated coconut in kadhai


  3. Add milk.

    Coconut-Laddu-Recipe-Step-3
    Added milk

  4. Cook it on medium flame. Stir occasionally. This will take more than 30 minutes. Stir often when the milk thickens.

    Coconut-Laddu-Recipe-Step-4
    Reducing milk

  5. Add sugar. You can also use jaggery powder instead of sugar.

    Coconut-Laddu-Recipe-Step-5
    Added sugar

  6. Add dry fruits. In this recipe, I have added cashews only. However, you can add any dry fruit of your choice. Melon seeds also taste very good with these laddus.

    Coconut-Laddu-Recipe-Step-6
    Added cashews

  7. Add elaichi powder. Mix it well. Press this mixture with the back of the spatula. Check if milk is coming out. If no then good to go otherwise keep on stirring it until mixture is really dry. Don't hurry for this step. If the mixture is not dry then it will become impossible to shape laddus.


    Coconut-Laddu-Recipe-Step-7
    Added elaichi powder

  8. Once the mixture is dry, transfer it to a plate and spread it. Let it cool down a bit.

    Coconut-Laddu-Recipe-Step-8
    Transferred to a plate for cooling

  9. Once your mixture is slightly cool and you are comfortable working with it, then start shaping laddus. For this, you need to take some mixture. Press it really tight first then start giving it round shape.

    Coconut-Laddu-Recipe-Step-9
    Shaping Laddus

  10. Laddus are ready! Don't forget to share it with your loved ones.😀
Coconut-Laddu-Recipe-Served
Coconut Laddus are ready!

Recipe Notes:

  1. The mixture should be very dry before you start making laddus. 
  2. If you are using jaggery instead of sugar then add it towards the end of the process. Otherwise, milk might curdle after adding jaggery. Amount of sugar or jaggery can be adjusted as per taste.
  3. Stir often when the milk thickens.
  4. Quantity of sugar/jaggery can be altered as per taste.


Rava uttapam recipe
Rava uttapam recipe with step by step photos.

Rava uttapam recipe is a very simple yet delicious recipe. It is a lazy recipe. Just soak rava for 3-4 hours. or maybe overnight. chop your favourite vegetables and start preparing uttapams! Unlike other dosa/cheela, you don't need to soak dal/rice for few hours then grind it and then ferment the batter before you can actually prepare it!

I usually prepare it next day after preparing Paneer. Rava/Sooji can be soaked in the water left after preparing paneer. Otherwise, rava can be soaked in curd and water. A lot of vegetables are added which takes its nutrition to another level. Vegetables like onion, tomato, carrot, capsicum, cabbage, spinach and even beetroot go really well with rava uttapam. You can also add grated Paneer. Try adding the different combination of vegetables and let me know which one is your favourite in the comment section below.

Here goes the detailed rava uttapam recipe with step by step photos...


Servings:  4-5
Ingredients:
Sooji/Rava(Semolina) - 2 cup
Curd - 1 cup
Water - 2 cups
Salt - to taste
Oil - 1.5 - 2 Tbsp
Vegetables (Any) - 1 - 1.5 cup
  • Coriander leaves - 1 small bunch (chopped)
  • Carrot - 1 (grated)
  • Spinach - 1/2 bunch (chopped)
  • Capsicum - 1 small size (finely chopped)
  • Tomato - 1-2 medium size (finely chopped)
  • Onion - 1 medium size (finely chopped)


Rava Uttapam Recipe:

  1. Soak rava with curd and water for 3-4 hours. 
  2. Now, add salt. Batter is ready for the first method
For both the methods it is important that the pan should be warm, not hot. If you are finding it difficult to spread the batter then your pan is too hot. For cooling it you can wait after each uttapam and rub onion/potato on your pan.

Method 1:

  1. Heat a non-stick pan. Put 1/4 tsp of oil and use a napkin to spread it evenly.
  2. Put 1.5 or 2 Tbsp of batter at the centre of the pan. 
  3. Spread it in the circular motion. Just like Dosa.
  4. Sprinkle vegetables. Press them slightly on the uttapam.
  5. Once the colour of the batter is dark and the corners are little brown, you can flip it. Apply some oil. Roast it from both the sides. The flame should be medium-high.
  6. Rava uttapam is ready!

Method 2:

  1. Mix all the vegetables in the batter itself.
  2. Put 1.5 or 2 Tbsp of batter at the centre of the pan. 
  3. Spread it in the circular motion. Just like Dosa.
  4. Once the colour of the batter is dark and the corners are little brown, you can flip it. Apply some oil. Roast it from both the sides. The flame should be medium-high. Rava uttapam is ready!


Rava Uttapam Recipe with Step by Step Photos:

1. Take 2 cups of rava.


2 cups of rava

2. Add 1 cup of curd.

Added curd

3. Add 2 cups of water.

Added water

4. Mix everything well. Soak it for 3 to 4 hours.

Soaked for 3 to 4 hours

5.  Add salt.

Added salt

6. Heat a pan. Add 1/4 tsp oil. Spread it evenly.

Applied oil on a little hot pan

7.  Spread the batter and sprinkle the chopped vegetables. Apply oil and roast it from both the sides. Uttapam is ready!

Spread the batter evenly and sprinkle the chopped vegetables.

8. For the second method, we can simply mix all the vegetables in the batter itself.

Added vegetables in the water

9. The batter is ready.

Batter is ready

10. Same as method 1, heat a pan. Spread oil evenly. Then spread the batter. It won't be as even as it was in method 1. 

Spread uttapam on the pan

11. Apply oil and flip it. Roast it well from both the sides.

Flipped uttapam
12. Uttapam is ready. Serve it hot with your favourite chutney or ketchup.

Rava Uttapam Recipe

Recipe Notes:

  1. Use the finest quality of rava. 
  2. Use a non-stick pan.
  3. Instead of soaking it in curd and water, you can also use the water left after making Paneer.
  4. Make sure that the pan neither too hot nor too cold while spreading the batter. If it is too hot then you will not be able to spread the batter evenly. If it is not at all hot then you will not be able to flip it easily.
  5. You can sprinkle some water on the pan after spreading the batter. Cover it and cook on medium-low flame. You can avoid using oil completely. Uttapam will be soft and you can prepare it without a single drop of oil.


Pav bhaji recipe with Step by Step Photos.

Pav bhaji is very famous fast food from Maharashtra. Vegetables are boiled and mashed then they are cooked with pav bhaji masala. Lime juice, fresh coriander and onions are sprinkled on the Bhaji. It is then served with soft pav toasted in butter.

Pav bhaji masala is the hero in this recipe. I have shared the recipe for pav bhaji masala as well. Although pav bhaji masala is readily available in the market, I would highly recommend that you prepare it at home. Its much more hygienic and can be prepared very quickly. Above all, nothing can match the flavour of freshly prepared masala.

You can prepare and store this masala as well. Make sure that it is in an airtight container. Use a clean and dry spoon everytime. Increase the quantities of whole spices proportionally to prepare this masala in large quantity.

So, Here goes the detailed Pav Bhaji Recipe...


Pav-Bhaji-Recipe-Served
Pav Bhaji Recipe

Servings: 5-6

Ingredients:

Pav bhaji masala:

Corriander seeds(Dhaniya) - 1 Tsp
Cumin seeds(Jeera) - 1/2 Tsp
Fennel seeds(Saunf) - 1/3 Tsp
Cloves - 3
Bay leaves - 1.5
Dried red chillies - 2
Peppercorns - 7-8
Cinnamon - 1 inch
Black salt - 1/4 tsp
Dry Mango powder(Aamchur powder) - 1/2 tsp

Pav Bhaji:

Potatoes - 2 (Medium size)
Cauliflower(roughly chopped) - 1 cup 
Carrots - 2
Peas - 100gm
Tomatoes - 3-4 (Medium Size)
Onion - 2 (Medium Size)
Green chillies - 2
Capsicum - 2 medium size
Butter - 2 Tbsp
Pav - 10-12
Oil - 1Tsp

Pav bhaji Recipe:

Pav Bhaji Masala:

  1. Dry roast all the whole spices - Coriander seeds, Cumin seeds, dried red chillies, bay leaves, cinnamon, fennel seeds, peppercorns, cloves.
  2. Grind it to a coarse powder.
  3. Add Black salt and Dry Mango (aamchur) powder.
  4. Grind it to a fine powder. Pav bhaji masala is ready! 

Bhaji:

  1. Pressure cook cauliflower, potatoes, carrots and peas.
  2. Heat oil and butter in a kadhai.
  3. Add chopped onions and slit green chillies. Saute them for about a minute.
  4. Add tomatoes and capsicum.
  5. Add pav bhaji masala, turmeric and salt.
  6. Mix everything well. Cook it on medium flame until its mushy.
  7. Add boiled vegetables.
  8. Mix and mash them well.


Pav bhaji Recipe with Step by Step Photos:

1. Take all the whole spices - Coriander seeds, Cumin seeds, dried red chillies, bay leaves, cinnamon, fennel seeds, peppercorns, cloves.

Pav-Bhaji-Recipe-Step-1
Whole Spices for Pav Bhaji Masala
2. Dry roast them.

Pav-Bhaji-Recipe-Step-2
Dry roasting whole spices
3. Grind them.

Pav-Bhaji-Recipe-Step-3
Grinding whole spices
4. Add black salt and Dry mango (aamchur) powder.

Pav-Bhaji-Recipe-Step-4
Added powdered masalas
5. Grind it to a fine powder. Pav bhaji masala is ready!

Pav-Bhaji-Recipe-Step-5
Pav bhaji masala is ready
6. Boil roughly chopped vegetables - Potatoes, cauliflower, peas and carrots.

Pav-Bhaji-Recipe-Step-6
Boiling roughly vegetables
7. Heat oil and butter in a kadhai. Butter burns very quickly if you are heating it alone.
Pav-Bhaji-Recipe-Step-7
Heating butter and oil
8. Add finely chopped onions and slit green chillies.

Pav-Bhaji-Recipe-Step-8
Added onions and green chillies
9. Add capsicum and tomatoes.

Pav-Bhaji-Recipe-Step-9
Added tomatoes and capsicum
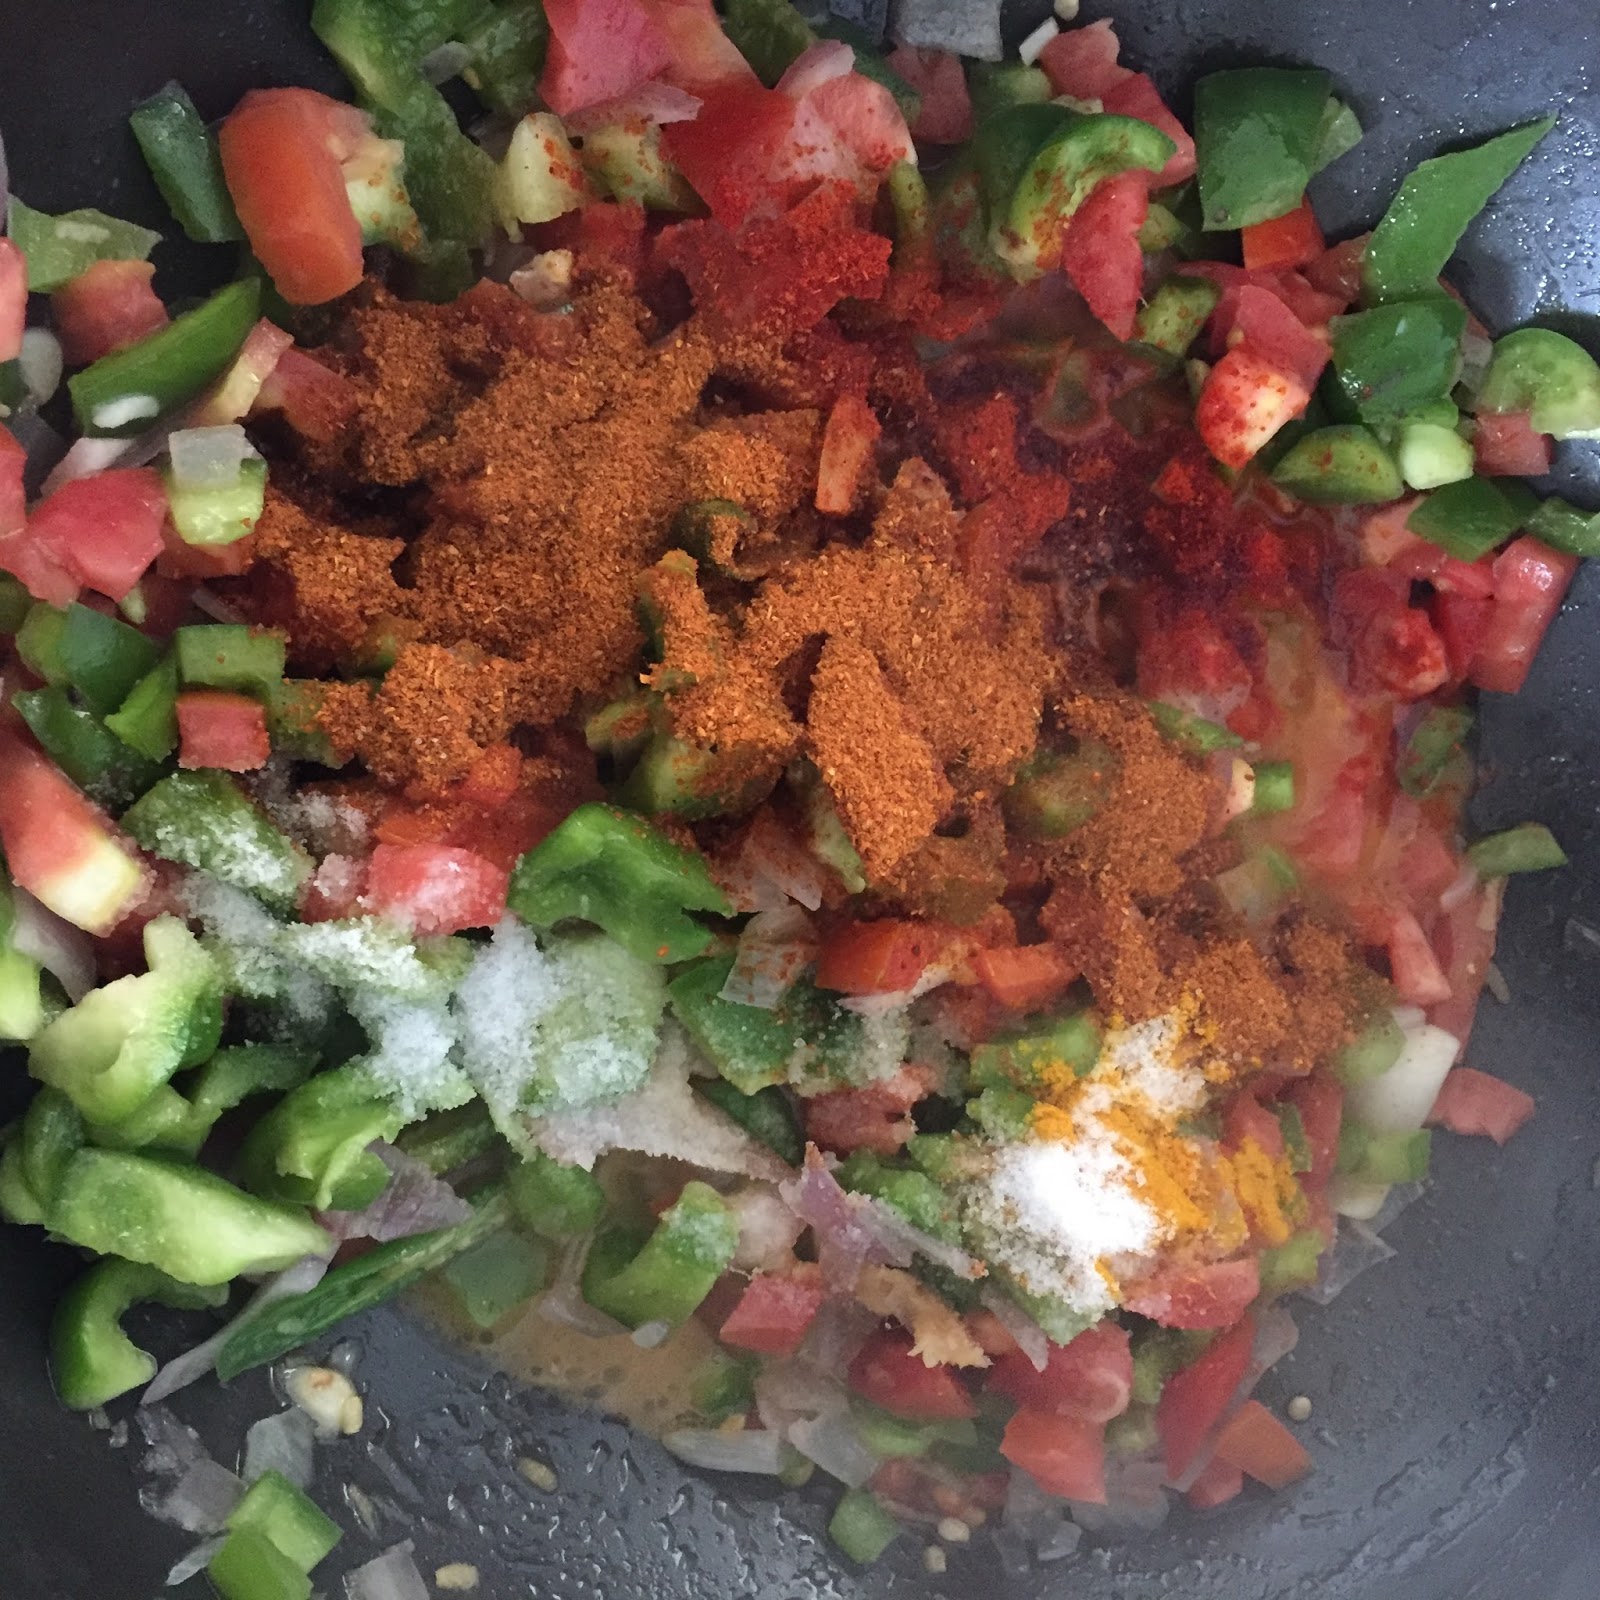
10. Add turmeric powder, salt and pav bhaji masala(Prepared in step 5).

Pav-Bhaji-Recipe-Step-10
Added salt, turmeric and pav bhaji masala
11. Add boiled vegetables. Mix everything well. Mash it with the back of your spatula. Cook it for a minute.

Pav-Bhaji-Recipe-Step-11
Added boiled vegetables
12. Save the excess water after adding boiled vegetables.

Pav-Bhaji-Recipe-Step-12
Saved Vegetable Stock
13. Add the vegetable stock now. Amount of vegetable stock you want to add depends on how much thick you want your bhaji to be.

Pav-Bhaji-Recipe-Step-13
Added vegetable Stock
14. Cook it and keep on mashing it. Bhaji is ready!

Pav-Bhaji-Recipe-Step-14
Cooking and mashing vegetables
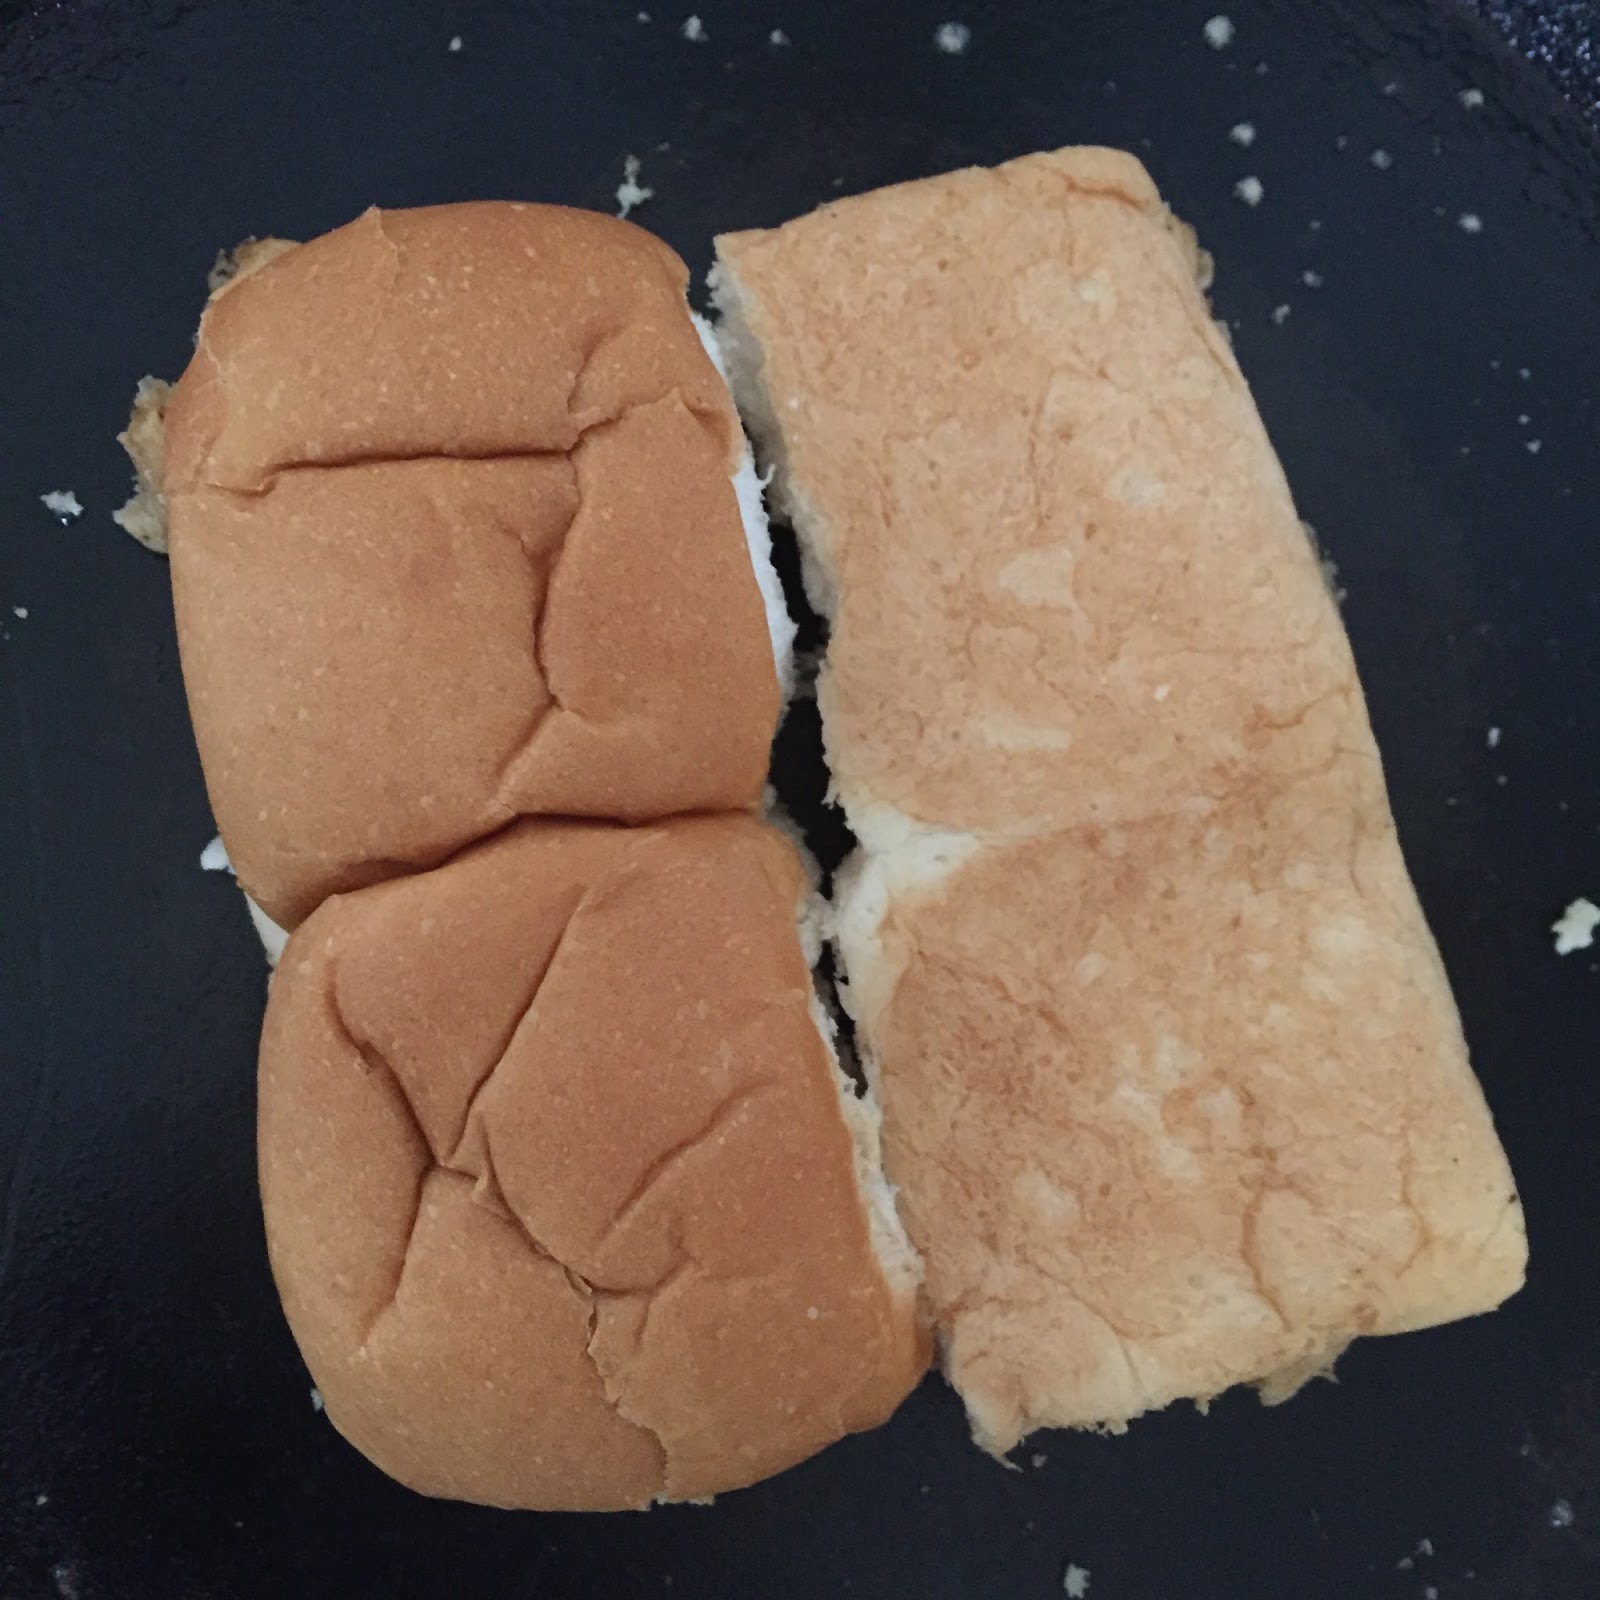
15. Time to roast pav with butter.

Pav-Bhaji-Recipe-Step-15
Roasting Pav with butter
16. Roast it from both the sides.

Pav-Bhaji-Recipe-Step-16
Roasting Pav from another side
17. Pav bhaji is ready! Add some lime juice and sprinkle some chopped onions and fresh coriander leaves before serving!


Pav-Bhaji-Recipe-Served
Pav bhaji is ready!

Do try this recipe and share your experience with me in the comment section below.