Samosa is a very popular tea time snack in India. Crispy crust and spicy stuffing makes it so irresistible! Learn how to make samosa recipe at home. Here goes the samosa recipe with step by step photos.

Servings: 12 Samosa

Cooking time: 1 Hr


Samosa-recipe-finalimage


Samosa recipe:

Ingredients:

Maida - 2 cups(1 cup = 250 ml)
Ghee - 3-4 tbsp
Carom seeds (Ajwain) - 1/2 Tsp
Salt - to taste

For stuffing:


Potatoes - 6-7 medium size
Coriander seeds(Dhaniya) - 1 1/2 Tsp
Cumin seeds(Jeera) - 1 1/2 Tsp
Dried red chilli - 1
Ginger - 2 inch
Green chilli - 2-3
Red chilli powder - 1 tsp or to taste
Dry mango powder(Aamchur powder) - 2 tsp 
Salt to taste

Method:


Most important part of samosa is definitely the stuffing! So, let's start with the yummy stuffing.

Stuffing for samosa:


1. Boil potatoes.
2. Meanwhile, dry roast 1 tsp coriander seeds and 1 tsp cumin seeds until it's fragrant.
3. Cool it. Then use a mixer to prepare a coarse powder. Keep it aside.
4. Heat oil in a pan. 
5. Add 1/2 Tsp cumin seeds, 1/2 Tsp coriander seeds and dried red chilli.
6. Add coarse ginger and green chilli paste.
5. Saute it for about a min, then add mashed boiled potatoes.
6. Add salt, red chilli powder, dry mango powder(Aamchur powder) and the powder that we have prepared in step 3. You can alter the quantity of the spices as per your taste.
7. Mix everything well. Add a little water and mix it well. Let it cook on low flame for about 2-3 minutes.
8. Stuffing is ready! Stuffing should be tasty. If anything is less or more then you can adjust it now.

Time to prepare the dough. 

Dough for samosa:


1. Mix Maida, ghee, salt and carom seeds(Ajwain). 
2. Hold a handful of maida and press it in your fist. Open your fist and check if it retains the shape then ghee is enough otherwise add a little more ghee. If you will not add the optimum amount of ghee then samosa will not become crispy.
3. Add water and knead a dough. 
4. The dough is ready. Cover it with a wet cloth. Keep it aside for 15 minutes.
5. Before making samosas apply a little oil on your hands and knead it once more.

Shaping and stuffing Samosa:


1. Take a small section of the dough. 
2. Roll it a little bit thicker than a chapati. Use oil for rolling it. It's a little difficult to roll maida that too without using maida for dusting. If you are a beginner and you are finding it really difficult then you can use maida instead of oil. Make sure that you brush out the excess maida after rolling.
3. Cut it into parts.
4. Form a cone with one section. Fill the stuffing inside it. 
5. Now you will have two sides. One where you have joined the straight line for the cone. Let's call it front side. And another one will be plain. So now you need to make a pleat on the back side. Apply water on both the sides and stick them together. Please check the pics below for the reference.

Frying samosa:


1. For frying samosa, we need hot oil.
2. Once the Oil is hot, slid the samosas inside it and reduce the flame to low. Don't increase the flame. This is a slow process. It will take at least 15 - 20 minutes. Make sure that there is enough oil and space in kadhai while frying samosas. If samosas will touch the base/sides of kadhai then they will not get the uniform colour. Fry until they are golden brown.
3. Once done keep it on an absorbent paper. 
4. Serve it hot with red chutney and green chutney.


Step by step recipe with photos:


1. Boil potatoes.

Samosa-recipe-step-1
Boil potatoes
2. Dry roast cumin seeds and coriander seeds.

Samosa-recipe-step-2
Dry roast coriander seeds and cumin seeds
 3. Cool down then put it in a mixer to make a coarse powder.
Samosa-recipe-step-3
Coarse powder with coriander and cumin seeds
4. Heat oil in a pan.

Samosa-recipe-step-4
Heat oil in a pan
5. Add cumin seeds and coriander seeds.

Samosa-recipe-step-5
Added cumin and coriander
6. Add dried red chilli. Don't forget to discard it before stuffing.

Samosa-recipe-step-6
Added dried red chilli
 7.  Add a coarse ginger and green chilli paste.
Samosa-recipe-step-7
Added ginger and chilli coarse paste
8. Mash boiled potatoes and add it.

Samosa-recipe-step-8
Added mashed potatoes
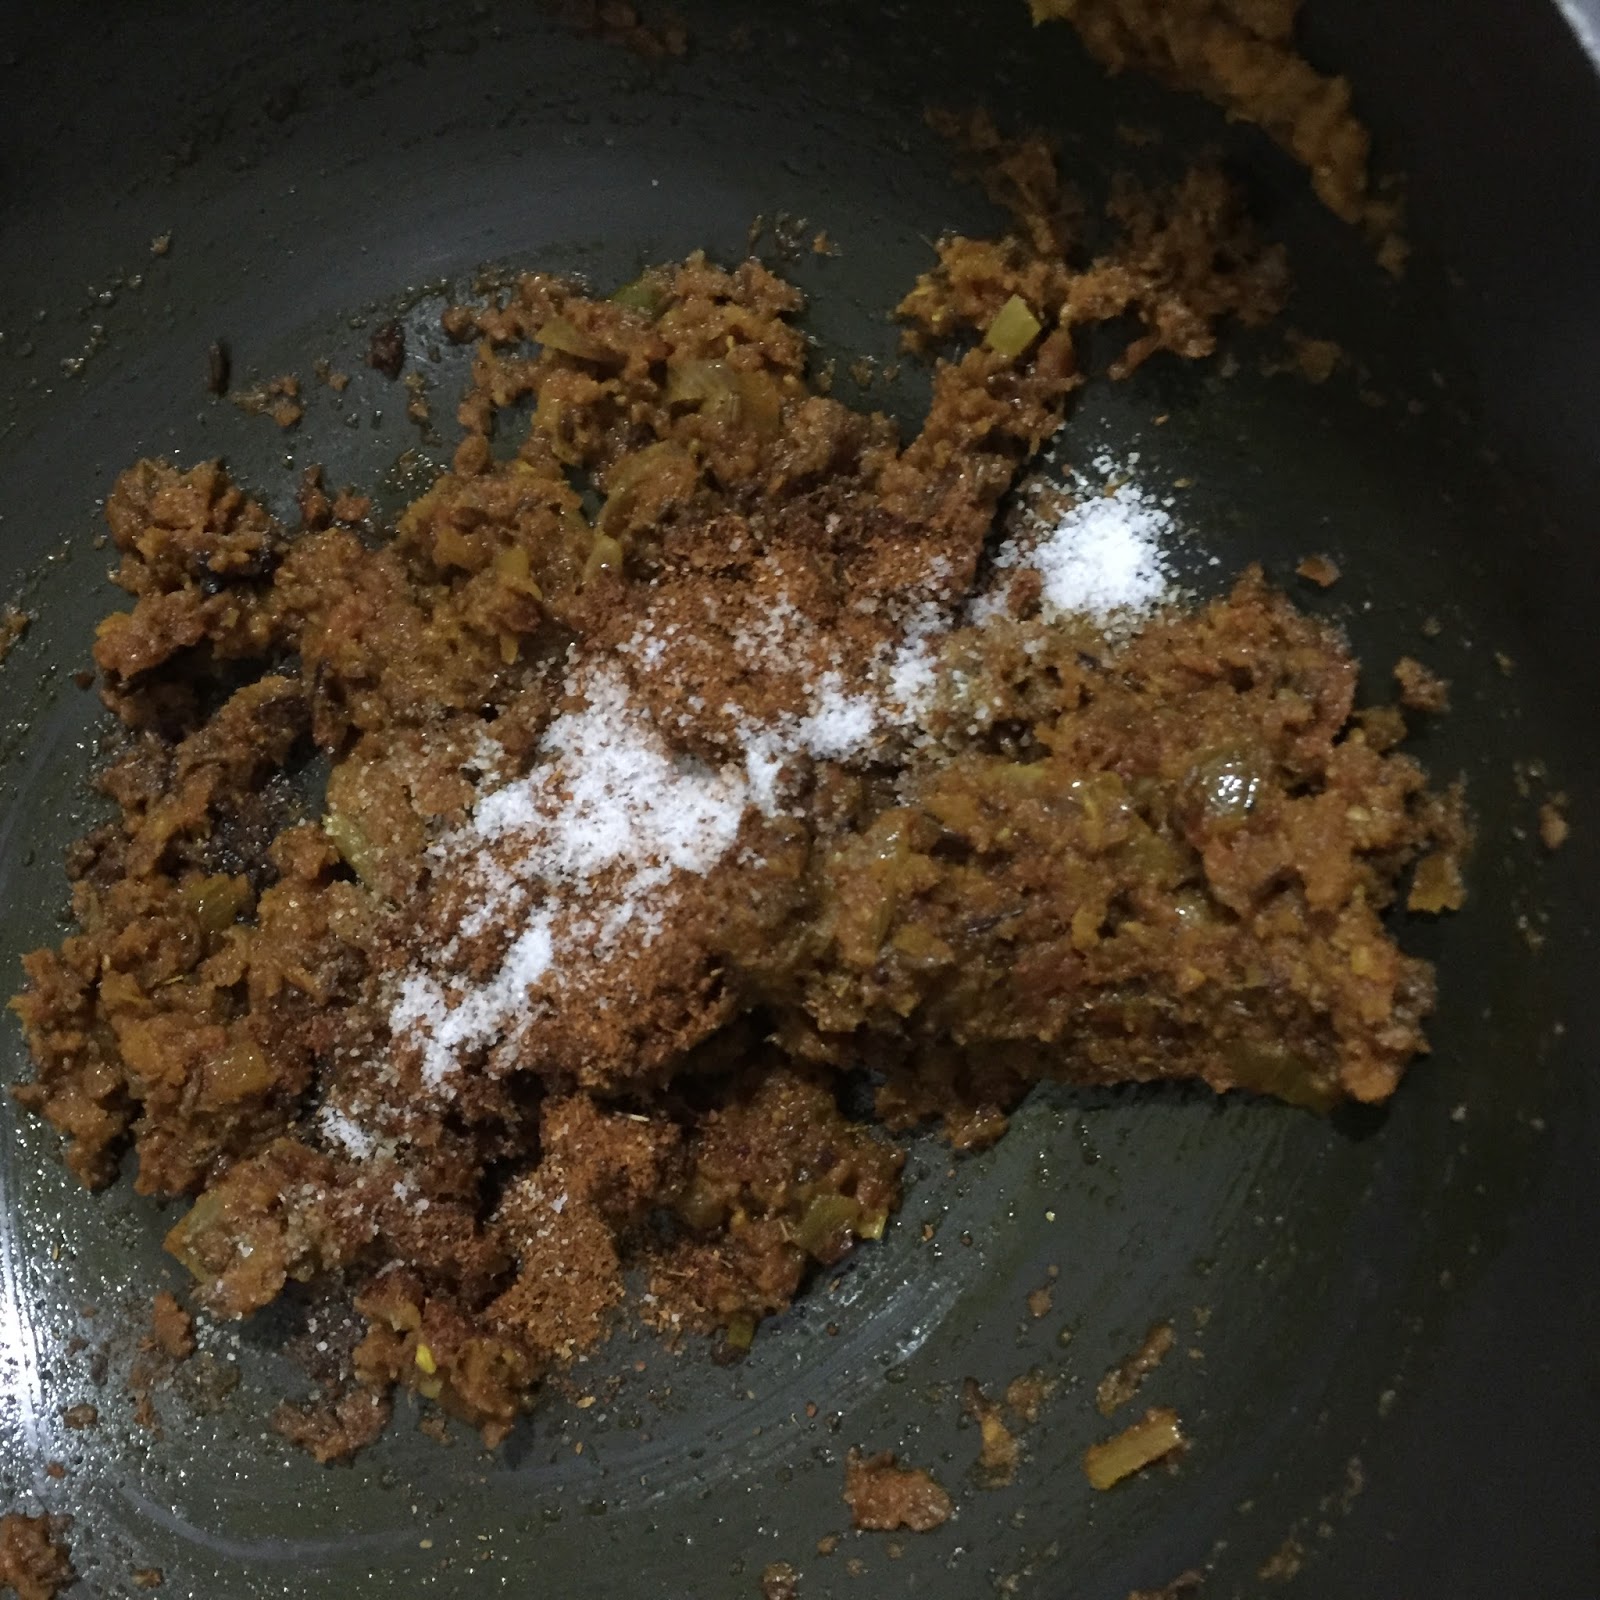
9. Add salt, red chilli powder, dry mango (Aamchur) powder and cumin-coriander powder prepared in step 3.

Samosa-recipe-step-9
Added Red chilli powder, dry mango powder, salt and cumin-coriander powder prepared above
10. Add a little water. Mix everything well. cover it and let it cook on low flame for 2-3 minutes.

Samosa-recipe-step-10
Mix well and add a little water
 11. Stuffing is ready now. Keep it aside. Now we will prepare the dough for samosa.
Samosa-recipe-step-11
Stuffing is ready.

 12. Mix all purpose flour(Maida), carom seeds(Ajwain), Salt and ghee. You can substitute ghee with refined oil.
Samosa-recipe-step-12
Mix all purpose flour, ghee, carom seeds(Ajwain) and salt
13. Hold and press it in your fist. It should clump together. If not, then add a little more ghee/oil.

Samosa-recipe-step-13
Check if the mixture clumps together when pressed
14. Use water to knead it into a dough.
Samosa-recipe-step-14
The mixture is perfect. Use water to knead it
 15. After kneading, cover it with a wet cloth for 15 minutes. Knead it again after applying oil in your hands. The dough is ready!
Samosa-recipe-step-15
The dough is ready. 
 16. Take a small section of the dough. Roll it a little bit thick than a chapati. Use oil for rolling it. It's a little difficult to roll maida that too without using maida for dusting. If you are a beginner and you are finding it really difficult then you can use maida instead of oil. Make sure that you brush out the excess maida after rolling.
Samosa-recipe-step-16
A section of dough for rolling
 17. Cut it into two equal parts.
Samosa-recipe-step-17
Cut it into two parts
 18. Make a cone with one section and stuff it. Brush it with water before sealing.
Samosa-recipe-step-18
Make a cone and stuff it
19. You have two sides. One where you have joined it to make a cone like structure and another one is plain. Make a pleat on the plain side as shown in the image below. Don't forget to seal it with water.
Samosa-recipe-step-19
Fold it from the back side
 20. Now seal both the sides together.
Samosa-recipe-step-20
Stick the bottom part

 21. Samosa is ready for deep frying.
Samosa-recipe-step-21
Ready for deep frying
22. Heat oil in a pan and then reduce the flame to low. Slid samosa inside hot oil. Let it cook for 15-20 minutes on low flame. Do not increase the flame. Low flame is the secret to a pimple free samosaπŸ˜‰
Samosa-recipe-step-22
Deep Frying

23. Samosa is ready to be served. Serve it with Red and green chutney. Let me know if you want the recipes of chutneys as well. I will be more than happy to share.
Samosa-recipe-finalimage
Samosa is ready!


Boondi k laddoo recipe is a simple recipe that can be prepared with minimal ingredients. Preparing sweet dishes at home is definitely something that we all should practice. It is much more hygienic and fresh. If we stick to only homemade sweets then definitely our consumption of sugar will reduce drastically.

Boondi-k-Laddoo-finalImage

So, today on the occasion of Ganesh Chaturthi, I have prepared boondi k laddoos. Here is the recipe of boondi k laddoo with step by step photos.

Ingredients:

Besan - 1 cup
Sugar - 1.5 cup
Roasted dry fruits (Any) - Handful
Cardamom - 3-4
Ghee/Oil for deep frying

Boondi k laddoo recipe:

  • Batter for boondi :

  1. Take one cup gram flour in a bowl. Add little water and mix well. Ensure that there are no lumps. Once you are sure that there are no lumps then slowly add more water. Keep on mixing it really well. You should whisk it for good 4-5 minutes.
  2. Final mixture will be of pouring consistency. Keep it aside. 

Now we need to prepare sugar syrup of one string consistency.

  • Sugar syrup:

  1. For preparing sugar syrup take 1.5 cups of sugar and 1 cup of water. 
  2. Boil it until you achieve one string consistency. 
  3. Sugar syrup is also done. Keep it aside
Time to prepare boondi!

  • Boondi:

  1. Heat ghee in a pan/ kadhai.
  2. Take a spatula with holes.
  3. Pour 1 tbsp batter on the spatula. Don't pour more than 1 tbsp Otherwise boondi will stick to each other to form a lump in the centre of kadhai.
  4. Fry them until golden brown.

  • Laddoos:

  1. Soak boondi in sugar syrup for 30-45 minutes.
  2. Mix Cardamon powder and roasted dry fruits too.
  3. Press this mixture with your hands and try to give round shape.
  4. Laddoos are ready! Don't forget to share it with your loved ones πŸ˜‹πŸ˜Š

Boondi k laddoo recipe with step by step photos:

  1. Take one cup of gram flour in a bowl.
Boondi-k-Laddoo-recipe-step-1
One cup gram flour(Besan)
2. Add a little water and mix it very well. Ensure that there are no lumps.

Boondi-k-Laddoo-recipe-step-2
Added a little water and mixed well to remove lumps
3. Add more water and whisk it for 4-5 minutes. Batter should be of pouring consistency. Once it is done you can keep it aside.

Boondi-k-Laddoo-recipe-step-3
Added more water to get pouring consistency
4. Take 1.5 cups of sugar in a saucepan.

Boondi-k-Laddoo-recipe-step-4
Sugar
5. Add 1 cup of water. Heat it until you get one string consistency.

Boondi-k-Laddoo-recipe-step-5
1.5 cups of sugar with 1 cup of water. 

6. Take a drop of sugar syrup between your thumb and finger. Test it as shown in the pic. If you get one string then its perfect. Turn off the stove and keep it aside. 

Note: Make sure that sugar syrup is not very hot when you are testing it.

Boondi-k-Laddoo-recipe-step-6
Test for one String consistency sugar syrup
7. Heat ghee in a kadhai for deep frying boondi. You can also take refined oil for deep frying.

Boondi-k-Laddoo-recipe-step-7
Heat ghee for deep frying
8. Take a spatula that has holes(as shown in the image below). Pour a tbsp of batter on this spatula. batter will take the shape of boondi. Deep fry it until golden brown.

Boondi-k-Laddoo-recipe-step-8
Preparing boondi wth spatulas
9. Boondi is ready.

Boondi-k-Laddoo-recipe-step-9
Golden brown Boondi
10. Add boondi in the sugar syrup. Also add cardamom powder and roasted roughly chopped dry fruits. Let it soak for about 30-45 minutes.

Boondi-k-Laddoo-recipe-step-10
Added boondi in sugar syrup with dry fruits and cardamom powder.
11. Now we have to give a perfect round shape to our laddoos. For this take a generous amount of boondi. Press it really tight. Keep on doing this until you are able to get good round balls!
Boondi-k-Laddoo-recipe-step-11
Making boondi k laddoo
12. Laddoos are ready! Don't forget to share.πŸ˜‹

Boondi-k-Laddoo-recipe-step-12
Laddoos are ready!


Kala chana masala recipe or kala chana curry recipe - is a simple yet tasty Punjabi cuisine. It prepared with black chickpeas and very basic ingredients like tomato, ginger, chillies and masalas found in every Indian Kitchen. It can be prepared quickly if you have already soaked kala chana at night! Here is the recipe of this delicious cuisine with step by step photos.


Kala-chana-masala-recipe-final-image

Ingredients:

Kala chana - 1 cup
Onion - 1(Medium size)
Ginger - 1 inch
Green Chillies - 3-4
Tomatoes - 2-3 (Medium Size)
Turmeric powder - 1/4 Tsp
Bhuna Jeera (Roasted cumin seeds powder) - 1/2 Tsp
Coriander (Dhaniya) powder - 1/2 Tsp
Chilli powder - 1/4 Tsp (Optional)
Salt - to taste
Mustard oil (or any cooking oil) - 2 tbsp

Kala chana masala recipe:

  1. Soak kala chana(black gram) overnight or for 8-10 hours. Boil it with Salt. Don't forget to add salt while boiling.  I do this mistake quite often.
  2. While kala chana is boiling you can put onions, tomatoes, green chillies and ginger in a mixer and make a smooth paste.  Keep it aside.
  3. Heat oil in a pan. I have used mustard oil, you can use any cooking oil.
  4. Add cumin seeds, red chilli powder, bhuna jeera(roasted cumin powder), coriander powder and turmeric powder. You can skip red chilli powder if you don't want it to be too spicy.
  5. Add the paste that you prepared in step 2.
  6. Mix it well. Let it cook on low-medium flame until oil separates.
  7. Now you can add salt. You have already added salt while boiling chana. So add it accordingly.
  8. Add boiled chana and the water left after boiling. You can make it a little dry or with gravy. So add water according to your preference. Mix it well.
  9. Cover it with a lid and let it cook for another 5-10 minutes on medium - low flame.
  10. Garnish it with Coriander leaves. Serve it hot with rice or roti.
How to prepare Kala chana masala recipe(Step by Step photos) :
  1. Soak kala chana(black gram) overnight or for 8-10 hours. Boil it with Salt. Don't forget to add salt. 

Kala-Chana-Masala-Step-1
Boil kala chana.

2. Put Onions, tomatoes, green chillies and ginger in a mixer and make a smooth paste.  Keep it aside.

Kala-Chana-Masala-Step-2
Added roughly chopped onions, tomatoes, ginger and chillies.


Kala-Chana-Masala-Step-3
Smooth paste of oinion, tomatoes, ginger and chillies.

3. Heat oil in a pan. I have used mustard oil, you can use any cooking oil.

Kala-Chana-Masala-Step-4
Mustard oil in a pan

4. Add cumin seeds, red chilli powder, bhuna jeera(roasted cumin powder), coriander powder and turmeric powder. You can skip red chilli powder if you don't want it to be too spicy.

Kala-Chana-Masala-Step-5
Added Jeera

Kala-Chana-Masala-Step-6
Added masala.

5. Add the paste that you prepared in step 2.

Kala-Chana-Masala-Step-7
Added onion, tomato, ginger and chillies paste.

6. Mix it well. Let it cook on low-medium flame until oil separates.

Kala-Chana-Masala-Step-8
Oil started separating from masala
7. Now you can add salt. You have already added salt while boiling chana. So add it accordingly.

Kala-Chana-Masala-Step-9
Added salt.

8. Add boiled chana and the water left after boiling. You can make it a little dry or with gravy. So add water according to your preference. Mix everything well.

Kala-Chana-Masala-Step-10
Added boiled kala chana.

9. Cover it with a lid and let it cook for another 5-10 minutes on medium - low flame.

Kala-Chana-Masala-Step-11
Added water.

10. Kala chana Masala is ready. Serve it with hot chapatis or rice.

Kala-Chana-Masala-Final-Image
Kala chana masala.


Sweet potato halwa recipe or shakarkandi halwa recipe is one of the simplest dessert recipes. No Masterchef skills are required to prepare this yummy dessert. Only hard work here is to stir it continuously. You can prepare sweet potato halwa for fastings as well as for any festive occasion.

Sweet Potato Halwa Recipe Image 12
Sweet Potato Halwa recipe

Preparation time: 30 Mins
Serves: 4
Ingredients for Sweet Potato Halwa Recipe:

  1. Boiled Sweet potato - 500 gms
  2. Ghee - 2 tbsp or more
  3. Milk(Full fat) - 250 ml
  4. Jaggery - to taste
  5. Cardamon - 4-5
  6. Dry fruits - handful

Sweet potato halwa recipe:

1. Boil peel and mash sweet potatoes.
2. Heat ghee in a pan.
3. Add mashed potatoes. Saute them for about 2 mins.
4. Add a little milk. Keep on stirring.
5. Add grated jaggery and mix it well. If you want to use sugar instead of jaggery then you can use sugar.
Note: If your jaggery is not dry at room temperature then don't add it now. Add it after adding dry fruits. Otherwise, milk will curdle.
6. Add more milk. 
7. Keep on stirring. This is the only step in Sweet Potato Halwa Recipe that demands some patience.
8. Add cardamom. Mix it well until it reaches this consistency that you want for sweet potato halwa.
10. Mix grated dry fruits and nuts. I have used cashews and almonds and raisins. You can add pistachios or dates or any dry fruit of your choice.  
12. Sweet potato halwa is ready. You can serve it hot or you can store it to serve with milk. Mix one table spoon of halwa with hot milk. It tastes amazing in both the ways.


How to prepare Sweet Potato Halwa Recipe (Step by step photos):

1. Boil peel and mash sweet potatoes.

Sweet Potato Halwa Recipe Image 1
Mashed Sweet Potatoes

2. Heat ghee in a pan. You can add more ghee if you want. It will taste goodπŸ˜‹

Sweet Potato Halwa Recipe Image 2
Ghee in pan

3. Add mashed potatoes. Saute them for about 2 mins.

Sweet Potato Halwa Recipe Image 3
Saute of Mashed Potatoes in Ghee

4. Add a little milk. Keep on stirring.

Sweet Potato Halwa Recipe Image 4
Milk Added

5. Add grated jaggery and mix it well.  If you want to use sugar instead of jaggery then you can use sugar. 
Note: If your jaggery is not dry at room temperature then don't add it now. Add it after adding dry fruits. Otherwise, milk will curdle.

Sweet Potato Halwa Recipe Image 5
Grated Jaggery Added

6. Add more milk. 

Sweet Potato Halwa Recipe Image 6
More Milk Added

7. Keep on stirring. This is the only step in Sweet Potato Halwa Recipe that demands some patience.

Sweet Potato Halwa Recipe Image 7
Mixture Stirred Well

8. Add cardamom. 

Sweet Potato Halwa Recipe Image 8
Cardamom Added

9. Mix it well until it reaches this consistency that you want for sweet potato halwa.

Sweet Potato Halwa Recipe Image 9
Thickening of Halwa Started

10. Mix grated dry fruits sand nuts. I have used cashews and almonds. You can add pistachios or dates or any dry fruit of your choice.

Sweet Potato Halwa Recipe Image 10
Dry Fruits Added

11. Add resins. 

Sweet Potato Halwa Recipe Image 11
Resins Added

12. Sweet potato halwa is ready. You can serve it hot or you can store it to serve with milk. Mix one table spoon of halwa with hot milk. It tastes amazing in both the ways.

Sweet Potato Halwa Recipe Image 12
Sweet Potato Halwa Recipe Complete


Mango Phirni is a sweet prepared by mixing aamras and Phirni. You can read Phirni's recipe here.
Today I will be sharing two variations of Mango phirni. In the first method, you can serve phirni and aamras in layers as shown in the image below.


You can be creative here by adding dry fruits in the layers or by adding something green like... fennel seeds. I would love to see your creativity. So, don't forget to share your Phirni pictures and your experience with me in the comment section below.

The second method is by mixing aamras and phirni. It is awesome in both the ways. Remember that you don't need to cook once you have added mango pulp and phirni otherwise the milk will curdle.
This is how it will look.


Ingredients:

For Aamras:

Mangoes - 3-4
Sugar / Jaggery - 2 Tbsp or to taste
Cardamom powder - 1/4 tsp

For Phirni:

Milk (Full Fat) - 1 litre
Rice - 2 tbsp
Sugar - to taste (Optional)
Jaggery - 3tbsp
Cardamom Powder - 1/4 tsp
Dry Fruits:
Dates - 3-4
Raisins - 3-4
Almonds - 3-4
Cashews - 3-4
Pistachios - 3-4

Method:

For Aamras:
  • In a blender add chopped mango pieces and sugar. Blend it. 
  • Mix Cardamom powder.
  • Aamras is ready. Keep it aside.

For Phirni:
  • Soak rice for 2-3 hours.
  • Grind it into a smooth paste.
  • Boil milk. Once it is boiled keep it on low flame.
  • Add Rice paste.
  • Keep on stirring it occasionally.
  • Stir it more frequently when it starts becoming thick.
  • Add jaggery and cardamom powder after about 30 mins. 
  • Add finely chopped dry fruits and keep on stirring it. Keep some Dry fruits aside for garnishing.
  • When you think it has reached desired thickness then you can turn off the stove. It will take approx 45 mins to 1 hour 15 minutes. It depends on how thick you want it to be.
  • Phirni is served chilled. So keep it in the refrigerator for some time.
  • If you want to serve like the first image then do the layerings with phirni and aamras. You can do slant partition also as phirni's consistency will be so thick.
  • For mango phirni like in the second image, Mix mango pulp and Phirni and garnish with dry fruits.
  •  Mango Phirni is ready!!! 
Here comes my third dish for Mango month! I hope you have checked my other mango recipes, i.e. Mango Rice and Mango Shrikhand. Raw mango chutney comes with several variations! Spicy, sour, sweet and sour, very sweet, less sweet.. seriously!! endless flavoursπŸ˜‹


Today I will be sharing the recipe of Raw mango and Ivy gourd chutney. This chutney is really sour!!! If you don't like sour chutneys then you can reduce the quantity of raw mango.You can also try adding jaggery or sugar if you want it to be sweet and sour. It is a no onion and garlic recipe can be prepared with minimal ingredients! So here goes the recipe for raw mango and ivy gourd chutney: 

Ingredients:

For Chutney:

Raw mango - 1(Medium size)
Ivy Gourd - 500 gm
Green chillies - 4-5
Oil - 1 tsp
Cumin Seeds - 1 tsp
Turmeric - 1/4 tsp
Salt to taste

For Tadka:

Ghee - 1 tbsp
Mustard seeds - 1/2 tsp
Urad dal - 1/2 tsp
Chana dal - 1/2 tsp
Curry leaves - 7-8
Asafoetida - 1 pinch

Method:

For Chutney:


  • Heat oil in a pan.
  • Add Cumin seeds. Let it splutter.
  • Add turmeric powder, chopped green chillies and chopped ivy gourd.
  • Let them cook on medium - low flame for about 20-25 mins. Keep on stirring occasionally. 
  • Turn off the flame when ivy gourd is cooked.
  • Keep it aside and let it cool.
  • Remove seed from raw mango and roughly chop it.
  • Put Chopped mango and Ivy gourd in a Mixer. Blend it 2-3 times for 3-4 seconds.

For tadka:


  • Heat ghee in a tadka pan.
  • Add chana dal and urad dal. When it starts becoming golden, add mustard seeds. Let it splutter.
  • Add Asafoetida.
  • Add curry leaves and turn off the stove immediately.
  • Add this tadka to the chutney. Mix it well
  • Tadaaa!!! Raw mango and Ivy gourd chutney are ready!
Do try this recipe. I love it when people try my recipes and experiment more with my recipes. Don't forget to share your experience in the comment section below. 😊 

More Mango recipes coming soon....

Mango rice is prepared with raw mango. It is popular in Andhra Pradesh, Karnataka and Tamil Nadu.  It is very easy to prepare. It can be prepared in less than 15 mins. Its preparation is similar to Lemon Rice. State wise there is a variation in the preparation of mango rice. Today I will be sharing Andhra style Mango rice recipe.  


I posted this pic on Instagram at the time of Ugadi as this is a Ugadi special recipe in Andhra but forgot to share the recipe then. πŸ˜› This month I am planning to share all the mango recipes only. This is my second Mango recipe. I hope you have checked out my first mango recipe i.e, Mango Shrikhand

Please comment the name of your favourite mango recipe. I will be more than happy to share the recipe.

Ingredients:

Cooked Rice - 3 cups
Raw Mango - 1
Fenugreek powder - 1 pinch (Optional)
Turmeric - 1/4 tsp
salt - to taste

For Tadka:

Ghee/Oil - 2 tsp
Dried red chilli - 1-2
Curry leaves - 8-10
Mustard seeds - 1/2 tsp
Urad dal - 1 tsp
Chana Dal - 1tsp
Asafoetida - 1 pinch

Method :

For extracting mango juice:


  • Grate raw mango with skin. 
  • In a tadka pan boil some water.
  • Add grated mango in water. Let it boil for some time. 
  • Mango juice is ready!
  • The quantity of mango juice that you want to add in rice will vary as per your taste and also on how sour raw mango was. 

For Mango rice:


  • Mix mango juice, salt, turmeric, Fenugreek powder and rice.
  • Rice should be hot when you are mixing these.

For Tadka:


  • Heat ghee/ oil in a tadka pan.
  • Add Chana dal, urad dal. When they become slightly golden in colour then add dried red chillies, mustard seeds, asafoetida. Let them splutter. 
  • Turn off the stove and add curry leaves.
  • Tadka is ready!
  • Add this tadka to mango rice. Mix it well. Mango rice is ready!


Srikhand is Indian sweet prepared with hung curd. It is very easy to prepare and can be prepared in less than 5 mins if hung curd is ready!!!Adding mango in shrikhand takes it to another levelπŸ˜‹ So here goes the recipe for mango shrikhand.


Preparation time: 3 hours 
Cooking time: 5
Serves: 3

Ingredients:

Mango - 1
Full fat Curd - 500 ml
Sugar (Powdered)- 3 - 4 tsp
Cardamom powder - 1/4 tsp
Fennel seeds(Saunf) - 1 tsp (Optional)
Cardamom - 4 - 5 (Optional)
Dry fruits - Any


Method:

For hung curd:

Tie curd in a muslin cloth and hang it for 2-3 hours.
Squeeze water after 2-3 hours. Hung curd is ready.

For Shrikhand:

Extract mango pulp and blend it well with sugar and hung curd.
Add cardamom powder and mix it well.
Srikhand is ready.

Garnish:

Dry roast cardamom and fennel seeds for about a min on medium flame.
Put them into a mixer with sugar to get a coarse powder.
Layer it with Srikhand as in the pic.
Top it with grated dry fruits. You can add dry fruits in layers too.
You can serve it immediately or refrigirate for some time before serving.

Golden milkshake or turmeric milk has endless benefits. It purifies the blood, builds immunity, relieves stress, boosts digestion, reduces arthritic pain, acts as a good sleep aid, great for skin and the list goes on and on...  I can write a blog only for explaining the benefits of turmeric milk! I love it when such super healthy foods are super tasty too. Just have a look at this pic!


 Mouthwatering!!!πŸ˜‹ Isn't it? I have one more good news for you. this super healthy + super tasty + good looking drink can be prepared in less than 5 mins! πŸ˜ƒ 

Ingredients:

Turmeric - 1 tsp
Milk - 250ml
Honey - 1 tsp(or as per your taste)
Pepper(Optional) - 1/4 tsp
Almonds(Optional) - 2 - 3

Method 1- Chilled:

  • Add chilled milk, honey and turmeric in a blender.
  • You can also add finely chopped almonds or any dry fruit of your choice. 
  • Blend it well.
  • The Golden milk shake is ready.

Method 2- Hot (Best for common cold and cough):

Use raw turmeric for this method. It is much better than turmeric powder. Raw turmeric looks like ginger. It is available in local markets. However, if you don't get raw turmeric then you can use turmeric powder.
  • Peel and grate turmeric. You can use gloves while doing this.
  • Add 1/2 tsp grated turmeric and pepper in milk. 
  • Let it boil.
  • Mix honey and drink it hot. 
  • It is one of the best remedies for  cough and cold.

Khoba roti is a Rajasthani dish. It is thick, crispy outside and chewy inside. It is served with dal or any thick gravy. when I saw it for the first time, my expression was like this πŸ‘‰πŸ˜. It is so enticing!!! Isn't it? Above all no master chef skills are required to prepare this beautiful dish. Yes! not even for this amazing pattern. How?!😦 Well, read the recipe to figure out. 


Ingredients:

Wheat Flour - 1 cup (150 grams)
Cumin Seeds - 1/4 tsp
Salt - to taste
Ghee -  2 tbsp approx.

Method:

For Dough:

  • Mix wheat flour, cumin seeds, salt and 2 tsp ghee. 
  • Now add little water to form slightly hard dough.
  • Keep it aside for about 20-25 mins. 
  • Grease your hand with oil and knead the dough until smooth.

For Roti:

  • Place a slightly big dough ball on the rolling plate and roll into 1/2 cm thick.
  • Start pinching it to give the pattern as shown in the image above. 
  • It's time to be creative! You can use tongs/ scissors also to create so many patterns. I would love to see your creativity. Please share your roti's pic in the comment section below.
  • Place it on a preheated pan with the pattern facing upwards. Reduce the flame. Let it cook very slowly. 
  • Pinching part can also be done after placing it on the pan.
  • When it is cooked from one side and gets brown spots then flip it. Let it cook from other side too. It is cooked on very low flame so it takes about 10-12 minutes to be cooked properly from both the side. 
  • Roti is ready! Spread about 1 tsp ghee on it.
  • Enjoy it with thick dal or thick spicy gravy of your choice.